安装nginx, let’s encrypt 和wordpress
2020/08
25
04:08
安装nginx 与wordpress 之前最好打开BBR加速,参考这里
based on ubunut 18.04
1.安装nginx
sudo apt update
sudo apt install nginx
sudo systemctl start nginx
配置iptables(或者ufw)打开80,443端口, 在此举例iptables
sudo apt-get install iptables-persistent
sudo nano /etc/iptables/rules.v4
在-A INPUT -j REJECT --reject-with icmp-host-prohibited 之前添加:
...
-A INPUT -p tcp --dport 80 -j ACCEPT
-A INPUT -p tcp --dport 443 -j ACCEPT
...如图

重载iptables
sudo iptables-restore < /etc/iptables/rules.v4
sudo netfilter-persistent reload
在浏览器输入
http://your_server_ip应该可以看到

2.创建let’s encrypt SSL Certificate
安装certbot
sudo apt-get install python-certbot-nginx配置nginx
sudo nano /etc/nginx/sites-available/default找到server_name 字段 加入域名
...
server_name sub.example.com;
...
测试修改后的nginx 配置
sudo nginx -t此处应该不报错, 如果报错 大概率是出现了语法错误
重启nginx
sudo systemctl reload nginx创建证书(注意修改sub.example.com 为你自己的域名)
sudo certbot --nginx -d sub.example.com证书有效期为90天 为了避免手动更新证书的麻烦我们可以让certbot 自动更新
sudo certbot renew --dry-run如果没有报错的话 certbot 就已经设置好了自动更新
optional: 编辑cert 配置 打开TLSv1.3 支持
sudo nano /etc/letsencrypt/options-ssl-nginx.conf


...
ssl_protocols  TLSv1.2 TLSv1.3;
ssl_prefer_server_ciphers on;

ssl_ciphers ECDHE-ECDSA-AES128-GCM-SHA256:ECDHE-RSA-AES128-GCM-SHA256:ECDHE-ECDSA-AES256-GCM-SHA384:ECDHE-RSA-AES256-GCM-SHA384:ECDHE-ECDSA-CHACHA20-POLY1305:ECDHE-RSA-CHACHA20-POLY1305:DHE-RSA-AES128-GCM-SHA256:DHE-RSA-AES256-GCM-SHA384;


...
3.安装wordpress
安装mysql
sudo apt install mysql-server配置mysql
sudo mysql_secure_installation登录myqsl 创建wordpress 账号 记得修改 ‘password’ 字段 使用更加安全的密码
sudo mysql -u root -p

CREATE DATABASE wordpress DEFAULT CHARACTER SET utf8 COLLATE utf8_unicode_ci;

GRANT ALL ON wordpress.* TO 'wordpressuser'@'localhost' IDENTIFIED BY 'password';

FLUSH PRIVILEGES;

EXIT;
安装PHP 插件
sudo apt -y install software-properties-common
sudo add-apt-repository ppa:ondrej/php
sudo apt-get update
sudo  apt install php7.4-cli php7.4-fpm php7.4-mysql php7.4-json php7.4-opcache php7.4-mbstring php7.4-xml php7.4-gd php7.4-curl
下载WordPress
cd /tmp
curl -LO https://wordpress.org/latest.tar.gz
tar xzvf latest.tar.gz
cp /tmp/wordpress/wp-config-sample.php /tmp/wordpress/wp-config.php
sudo cp -a /tmp/wordpress/. /var/www/wordpress
sudo chown -R www-data:www-data /var/www/wordpress
配置WordPress配置文件
生成密码
curl -s https://api.wordpress.org/secret-key/1.1/salt/范例输出:
define('AUTH_KEY',         '1jl/vqfs<XhdXoAPz9 DO NOT COPY THESE VALUES c_j{iwqD^<+c9.k<J@4H');
define('SECURE_AUTH_KEY',  'E2N-h2]Dcvp+aS/p7X DO NOT COPY THESE VALUES {Ka(f;rv?Pxf})CgLi-3');
define('LOGGED_IN_KEY',    'W(50,{W^,OPB%PB<JF DO NOT COPY THESE VALUES 2;y&,2m%3]R6DUth[;88');
define('NONCE_KEY',        'll,4UC)7ua+8<!4VM+ DO NOT COPY THESE VALUES #`DXF+[$atzM7 o^-C7g');
define('AUTH_SALT',        'koMrurzOA+|L_lG}kf DO NOT COPY THESE VALUES  07VC*Lj*lD&?3w!BT#-');
define('SECURE_AUTH_SALT', 'p32*p,]z%LZ+pAu:VY DO NOT COPY THESE VALUES C-?y+K0DK_+F|0h{!_xY');
define('LOGGED_IN_SALT',   'i^/G2W7!-1H2OQ+t$3 DO NOT COPY THESE VALUES t6**bRVFSD[Hi])-qS`|');
define('NONCE_SALT',       'Q6]U:K?j4L%Z]}h^q7 DO NOT COPY THESE VALUES 1% ^qUswWgn+6&xqHN&%');
修改p-config.php 找到 define 字段 把之前的输出 填入define 字段
sudo nano /var/www/wordpress/wp-config.php把以下
. . .

define('AUTH_KEY',         'put your unique phrase here');
define('SECURE_AUTH_KEY',  'put your unique phrase here');
define('LOGGED_IN_KEY',    'put your unique phrase here');
define('NONCE_KEY',        'put your unique phrase here');
define('AUTH_SALT',        'put your unique phrase here');
define('SECURE_AUTH_SALT', 'put your unique phrase here');
define('LOGGED_IN_SALT',   'put your unique phrase here');
define('NONCE_SALT',       'put your unique phrase here');

. . .
修改为
. . .

define('AUTH_KEY',         '之前的输出');
define('SECURE_AUTH_KEY',  '之前的输出');
define('LOGGED_IN_KEY',    '之前的输出');
define('NONCE_KEY',        '之前的输出');
define('AUTH_SALT',        '之前的输出');
define('SECURE_AUTH_SALT', '之前的输出');
define('LOGGED_IN_SALT',   '之前的输出');
define('NONCE_SALT',       '之前的输出');

. . .
修改数据库信息
. . .

define('DB_NAME', 'wordpress');

/** MySQL database username */
define('DB_USER', 'wordpressuser');

/** MySQL database password */
define('DB_PASSWORD', 'password');

. . .

define('FS_METHOD', 'direct');
配置nginx, 此处可以按照需要新建一个nginx config 对应与wordpress, 为了演示 这里直接在default上进行修改
sudo nano /etc/nginx/sites-available/defaultserver {
. . .
root /var/www/wordpress;
index index.php index.html index.htm index.nginx-debian.html;
location = /favicon.ico { log_not_found off; access_log off; }
location = /robots.txt { log_not_found off; access_log off; allow all; }
location ~* \.(css|gif|ico|jpeg|jpg|js|png)$ {
expires max;
log_not_found off;
}
location / {
#try_files $uri $uri/ =404;
try_files $uri $uri/ /index.php$is_args$args;
}
location ~ \.php$ {
include snippets/fastcgi-php.conf;
fastcgi_pass unix:/run/php/php7.4-fpm.sock;
}
. . .
}保存并测试
sudo nginx -t重启nginx服务
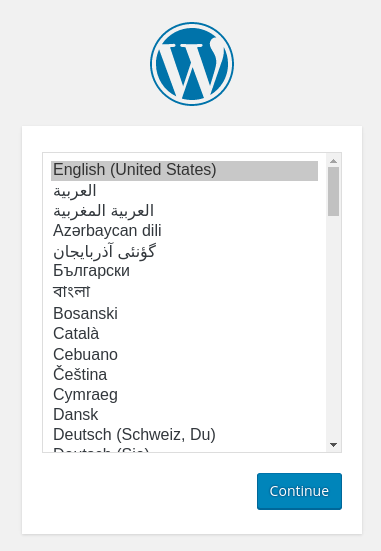
sudo systemctl reload nginx打开浏览器输入
https://your_server_ip
--转载请注明: https://jp.traekle.com/2020/08/25/%e5%ae%89%e8%a3%85nginx%ef%bc%8c-lets-encrypt-%e5%92%8cwordpress/

发表回复